![]() |
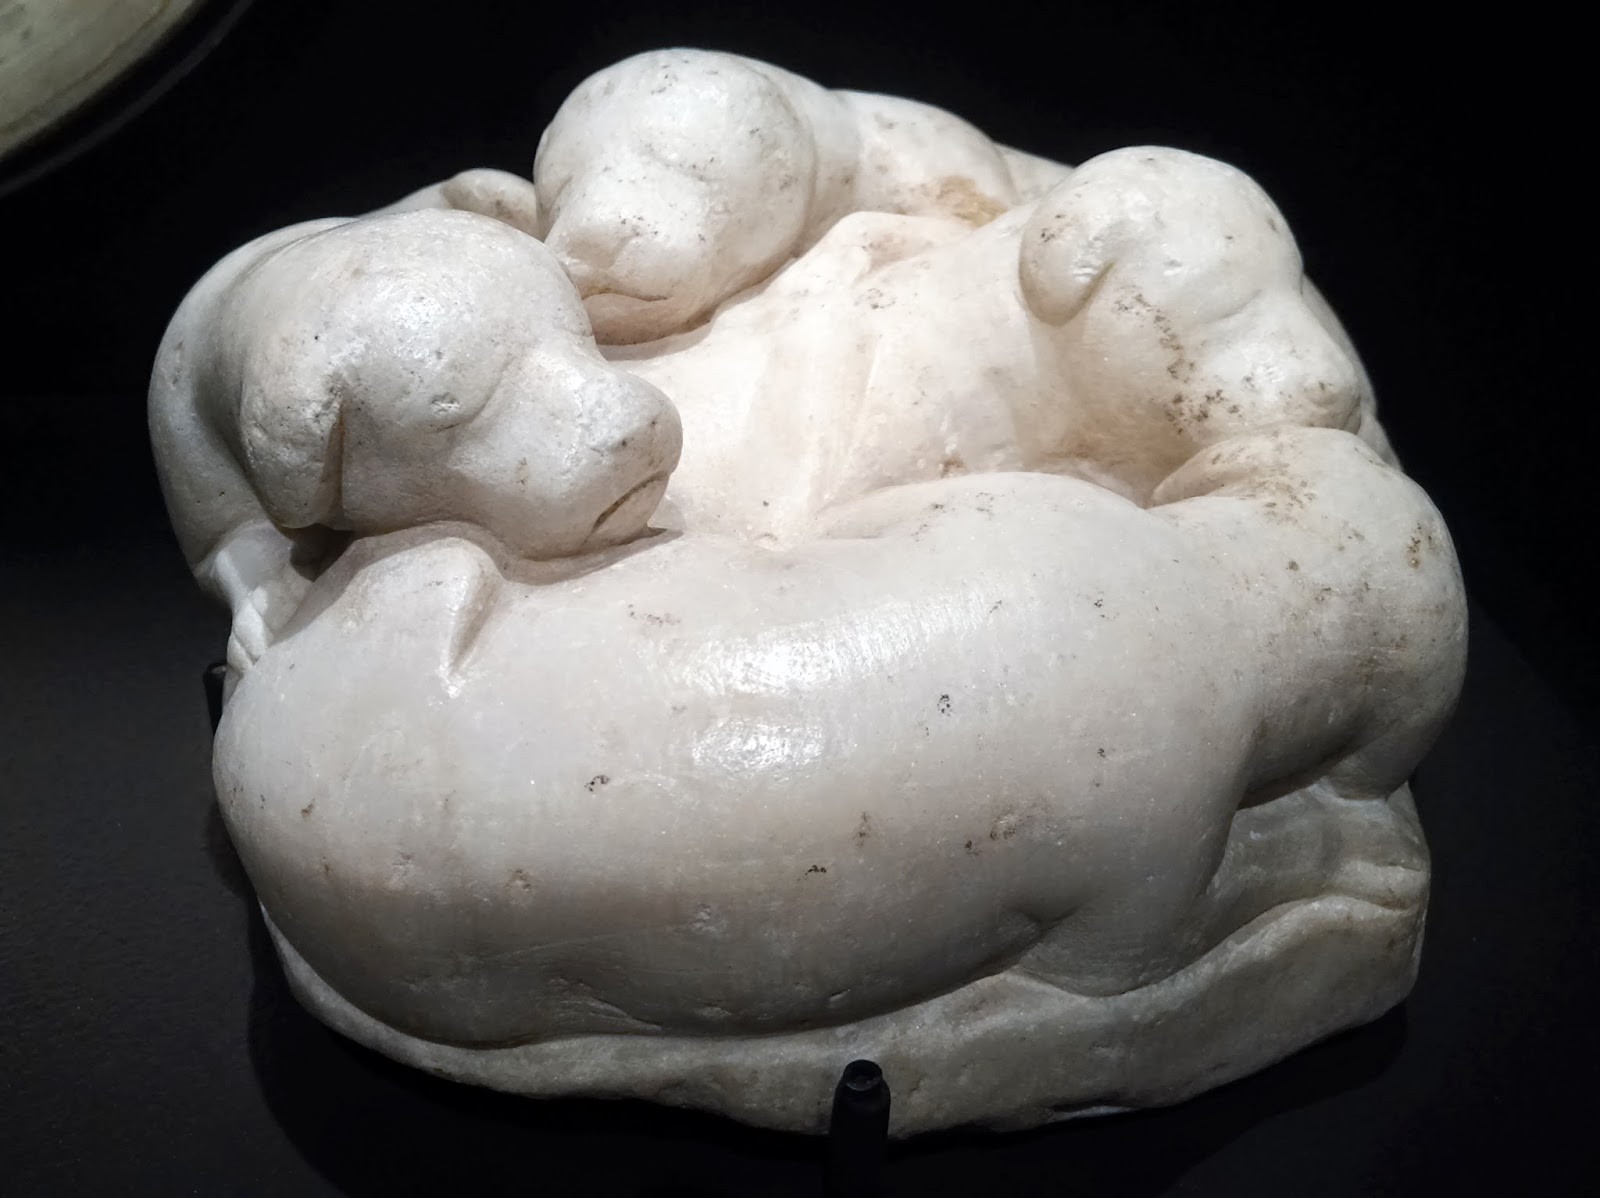
| Who can resist sleeping puppies? |
Showing posts with label Pic o' the Day. Show all posts
Monday, July 21, 2014
Pic o' the Day #1309- Dog Day Afternoon
Wednesday, July 16, 2014
Pic o' the Day #1307- Snakes Alive!
In Roman times the snake was not seen as a symbol of evil but quite the opposite- of good fortune and longevity. Everywhere you look in Pompeii you will find decorations featuring snakes receiving offerings- in this case a pine cone and what looks like a fig, sitting on top of an altar. They are part of the decoration of a lararium, the small household (or even business- they are found in many of the town's restaurants) shrine where ancestry and family rites were celebrated.
Tuesday, July 15, 2014
Pic o' the Day #1306- the Roots of Linoleum
Pompeii also has great floors, and that's one of the prime concerns in terms of conservation. Besides the laborious full mosaic patterns, there was also a technique called opus signinum that incorporated smaller bits of stone in a cementitious flooring material that was durable and shiny, but less costly than a mosaic. Many different patterns can be found around town, both indoors and out. Actually, it's more like terrazzo than linoleum, but the patterning is not unlike what you'd find today on peel and stick tiles at Home Depot.
| In the House of the Gilded Cupids (Amorini Dorati) |
| Same house, different room. |
Monday, July 14, 2014
Pic o' the day #1305- Wine and painting, a long tradition!
This post is simply about something that I thought was pretty cool when we were last in Pompeii. I've already ranted about how much of the painted walls were inaccessible, but this was a new development I enjoyed seeing.
They've long been mapping out the placement and even the type of plants that were in Vesuvius' shadow, using the same technique they originated to record the positions of the bodies found in the ashes. They pour plaster into the voids left by organic matter to see the approximate shape of it, using it to produce castings of bodies, wooden objects, and even the roots of plants like these grape vines (the upper parts would have been mostly burned away by the hot gases and ash.) Recently one of the projects has been to replant a number of the vineyards in the exact configuration of the originals, even using antique vine stocks and trellising techniques to get as close as possible to the way the Pompeiians grew. I'm certain that wines based on these original varieties can't be far behind. Wonder what they'll name it?
| The style of trellising the grapes is partly based on fresco depictions of vineyards that appear in a number of Pompeiian houses. |
| Even the varieties are researched through seeds and the shapes of the roots found. |
| This beautiful little peristyle garden is in the House of the Gilded Cupids (Amorini Dorati) and is also based on the root castings made from the plants that were there in 79AD |
Thursday, July 10, 2014
Pic o' the Day #1303- Pompeii revisited
Those of you who were reading the blog last year (http://artworks2000.blogspot.com/2014/01/day-28-poopei-or-is-it-pompoop.html) as I was taking these shots know that I was pretty bitter the day we visited Pompeii, because of all the closures. I guess the lack of funding has finally reached a crisis point where they have just decided to lock up huge areas, including whole streets, from viewing.
Nevertheless there were some choice bits that were still on view, like this detail of a gryphon from the Stabian Baths. I'd be curious to hear from anyone who's going (or has already been) there this summer as to how it's looking and how much of it is closed.
| Fresco of a gryphon in the Stabian Bath at Pompeii |
Wednesday, July 9, 2014
Pic o' the Day #1302- How I do what I do part two
Last summer I took 10,500 photos of Italy, 99% of which were pictures of painting and architecture (I'm not very good about snapping people!) It's very time consuming and pretty distracting - especially if you're trying to absorb the atmosphere of the place at the same time. Nevertheless, I find it exhilarating, and it compels me to keep moving even when it's boiling hot and humid, and I haven't had food or drink in hours.
I thought I'd take a minute here to talk about my methods, since it is a fairly challenging photographic assignment, and one at which most artists are not very good.
First off, equipment. I don't usually bring my big noisy SLR camera with me- it's just too bulky and attention grabbing when photos are prohibited. I have found that my long zoom Nikon S9100 gets the job done pretty well in most situations. There's a newer version now- the S9700- that has even longer zoom (30x) and higher resolution, and you can pick one up for less than $300. With the camera lens retracted (turned off) it slips in my pocket easily, it has most of the controls I would wish for (other than manual focus, which would be nice,) and it can be set to total silence (nice when shooting in stealth mode). If I had loads of cash (I don't!) I'd probably get one of those shutterless mini-cams too. They are silent and smaller than an SLR, but have better optics and controls than the compact cam.
The biggest challenge I usually face is the lighting; most of the old buildings with painted walls are not very well lit, and often the details I'm interested in are high up or far away, meaning using zoom, which cuts down even more on the available light. So there's a few strategies to cope with this. Flash is not allowed in almost all of these places, and it is a very obvious giveaway if you use it. I do sometimes use it in remote places where there is no lighting at all, like some of the houses at Pompeii. Flash creates problems of its own with reflections on shiny surfaces, and it only works up to about 12 feet away anyways, so it's of limited use. Most of the time I manually set the camera to "no flash", using one of the outside controls.
Longer exposures allow more light into the camera, but they also mean the camera must be held still, and since tripods are not allowed in most sites, I often put the camera on some fixed object- a wall, column, or rail; preferably something that is not painted, so as to avoid adding to the damage that time has wrought on these fragile places. I am also accustomed to standing very still, holding my arms at my sides, and holding my breath when I take a hand held image. You can hold a small camera steady down to about 1/10th of a second- below that you are risking motion blurriness.
So how else can you keep from blurring? What happens if you leave a camera on fully auto is that it will want to expose to an average light amount, meaning that it will leave the lens open until it gets enough light to satisfy the sensors. If the room is dark, that means it will leave the lens open a long time, meaning there is more danger of blurring. The first thing I try is to manually decrease the exposure index, a feature which many cameras - even cheaper compacts- include in their controls. This means the camera will shoot faster, meaning less light, so the image will be darker, but I then adjust that using Photoshop after I have downloaded to the computer. I don't usually shoot in RAW mode (I probably should) because it takes a lot of memory to do so, but it does allow for even more exposure adjustment after the picture is taken. You'd be amazed at how much hidden information can be in a digital file just waiting to be coaxed out with a photo editing program.
The other option for increasing the amount of light available to the camera is to raise the ISO number, which you can do through the menu of most inexpensive cameras. This essentially makes the sensor more sensitive, meaning faster exposures, but it also increases somewhat the amount of digital "noise" the camera will pick up, so you have to be a bit judicious with it. If I was going into a very low lit place and didn't think i'd have much chance to balance my camera against some fixed object, this is what I would use. Otherwise I usually set the ISO on auto and use the exposure index to give me a quicker shutter speed.
One tricky factor with balancing your camera against some fixed element is that you often get strange angles and intruding bits in your shot. This is where familiarity with Photoshop (or another photo editing program) comes in handy. Photoshop has a very nice feature in its cropping mode that allows you to compensate for perspective distortion, essentially allowing you to pull the corners of the cropping box into whatever shape you choose to make the subject squared up. It can only go so far before you get distortion of the image, but it's very handy for squaring up an image of something that is high on the wall, or taken at an angle to avoid reflections.
Here's an example of a shot before and after I made adjustments in Photoshop:
I thought I'd take a minute here to talk about my methods, since it is a fairly challenging photographic assignment, and one at which most artists are not very good.
First off, equipment. I don't usually bring my big noisy SLR camera with me- it's just too bulky and attention grabbing when photos are prohibited. I have found that my long zoom Nikon S9100 gets the job done pretty well in most situations. There's a newer version now- the S9700- that has even longer zoom (30x) and higher resolution, and you can pick one up for less than $300. With the camera lens retracted (turned off) it slips in my pocket easily, it has most of the controls I would wish for (other than manual focus, which would be nice,) and it can be set to total silence (nice when shooting in stealth mode). If I had loads of cash (I don't!) I'd probably get one of those shutterless mini-cams too. They are silent and smaller than an SLR, but have better optics and controls than the compact cam.
The biggest challenge I usually face is the lighting; most of the old buildings with painted walls are not very well lit, and often the details I'm interested in are high up or far away, meaning using zoom, which cuts down even more on the available light. So there's a few strategies to cope with this. Flash is not allowed in almost all of these places, and it is a very obvious giveaway if you use it. I do sometimes use it in remote places where there is no lighting at all, like some of the houses at Pompeii. Flash creates problems of its own with reflections on shiny surfaces, and it only works up to about 12 feet away anyways, so it's of limited use. Most of the time I manually set the camera to "no flash", using one of the outside controls.
Longer exposures allow more light into the camera, but they also mean the camera must be held still, and since tripods are not allowed in most sites, I often put the camera on some fixed object- a wall, column, or rail; preferably something that is not painted, so as to avoid adding to the damage that time has wrought on these fragile places. I am also accustomed to standing very still, holding my arms at my sides, and holding my breath when I take a hand held image. You can hold a small camera steady down to about 1/10th of a second- below that you are risking motion blurriness.
So how else can you keep from blurring? What happens if you leave a camera on fully auto is that it will want to expose to an average light amount, meaning that it will leave the lens open until it gets enough light to satisfy the sensors. If the room is dark, that means it will leave the lens open a long time, meaning there is more danger of blurring. The first thing I try is to manually decrease the exposure index, a feature which many cameras - even cheaper compacts- include in their controls. This means the camera will shoot faster, meaning less light, so the image will be darker, but I then adjust that using Photoshop after I have downloaded to the computer. I don't usually shoot in RAW mode (I probably should) because it takes a lot of memory to do so, but it does allow for even more exposure adjustment after the picture is taken. You'd be amazed at how much hidden information can be in a digital file just waiting to be coaxed out with a photo editing program.
The other option for increasing the amount of light available to the camera is to raise the ISO number, which you can do through the menu of most inexpensive cameras. This essentially makes the sensor more sensitive, meaning faster exposures, but it also increases somewhat the amount of digital "noise" the camera will pick up, so you have to be a bit judicious with it. If I was going into a very low lit place and didn't think i'd have much chance to balance my camera against some fixed object, this is what I would use. Otherwise I usually set the ISO on auto and use the exposure index to give me a quicker shutter speed.
One tricky factor with balancing your camera against some fixed element is that you often get strange angles and intruding bits in your shot. This is where familiarity with Photoshop (or another photo editing program) comes in handy. Photoshop has a very nice feature in its cropping mode that allows you to compensate for perspective distortion, essentially allowing you to pull the corners of the cropping box into whatever shape you choose to make the subject squared up. It can only go so far before you get distortion of the image, but it's very handy for squaring up an image of something that is high on the wall, or taken at an angle to avoid reflections.
Here's an example of a shot before and after I made adjustments in Photoshop:
| Here's the original shot, taken from an angle to avoid reflections of the natural light, and dark because I had suppressed the exposure index (and because it was a rainy dark day too.) |
Monday, July 7, 2014
Pic o' the Day #1301- How I do it.
I'm still slowly working my way through the backlog of photos I took on my trip last summer (I took over 10,000!), reliving each day with much pleasure. As I go through the piles of images, I color correct, straighten them, and add keywords so that I can find them later on. I use a program from Adobe called Lightroom, which has both development and organizational modes, handy when you have a lot of photos (235,867 and counting!) I also try to track down who the artist(s) might have been, the date of the art, and categorize into styles and periods. Sometimes (usually), when I'm shooting somewhere it's hard to keep track of all the info, so I try to shoot the placards in the room, or some other clue as to who, when, or why. It can be a bit of a puzzle when I get home to put it all back together, and I spend many hours on Wikipedia, Google, and Flickr connecting the dots and filling in gaps with other people's info and photos.
Tomorrow I'll talk some more about how I shoot these pics.
Sunday, July 6, 2014
Pic o' the Day #1300
I should really start numbering these so that I'll have some reference for future searches. So, counting up all the ones I've already posted on Facebook, this is roughly number 1300, starting from May 11th, 2010. I still need to figure out how to download all of those (with their captions) so that I can repost here and make it all searchable. If you have not already, please take a look at some of the older albums- starting with #1. You'll have to be a Facebook member to see these.
Anyways, here's a nice shot of a detail from the Villa of Poppaea at Oplontis (see yesterday's post for more info on the villa.) My guess is that this would be depicting some kind of funereal urn, but it's more the painted treatment that interests me. Look at how simple but effective and atmospheric the rendering of the gold top and leaves is, and the cast shadow on the cylinder adds so much dimension to the piece. As usual, the depiction of circles in perspective is well done, but inconsistent. The top and leaves are seen from underneath, and their shapes are appropriately rendered as ellipses, but the base is seen as dead on, although the plane it is sitting on appears to be seen from above. It's like they had thought about it, but just hadn't quite straightened out the details.
Saturday, July 5, 2014
Pic o' the day
On the way down the coast from Naples to Pompeii, after you pass Herculaneum, you come to a town called Torre Annunziata, where you can easily walk from the Circumvesiana train stop down to the ruins at Oplontis, thought to have been the Villa of Poppaea, Nero's wife. It is a fabulous house, somewhere around 15,000 sq ft, with an olympic size pool in the side yard. It also has very fine ornamental painting throughout, and it is in very good condition, with roofs and protection for the walls, and even some lighting for dark days (which it was when we were there.) It also has nowhere near the crowds you will find at Pompeii and Herculaneum, so I highly recommend making a stop.
There are so many great aspects to this image from the oecus, or great room if you will, of the house. The peacock sitting on a ledge decorated with a nice cyma molding, the tragic theater mask, and the false vista of a two tiered colonnade stretching back into atmospheric haze. Not to mention the trompe l'oeil fluting of the columns on each side, which are done entirely with paint.
Friday, July 4, 2014
Happy Fourth of July!! A year ago today I was shocked and awed by the decorative work I saw at the Villa Torlonia, an exquisite house in Rome that has been painstakingly restored since the 1970's. Very fine, very high quality workmanship throughout the house. It housed Mussolini during the war and then afterwards the Allied command.
| Nice Red White and Blue celebration on the walls of the Villa Torlonia in Rome. |
Thursday, July 3, 2014
Ok- as of today, as per wife's request, I will start posting my pic' o' the days here on the blog, and posting a link to art works. I hope it's not too cumbersome! This way i won't leave all my posts at the whim of Facebook, who could just snatch it all away if they wanted. It will also mean that I can tag the posts and the data will be searchable. Now if I could just figure out an easy way to transfer the (over 2,000) photos and comments I've already put on Facebook!!
| One more shot from the Palazzo Colonna- a very nice trompe l'oeil overdoor panel. 18th century work by Roman artist Giovanni Angeloni. |
Subscribe to:
Posts (Atom)